Core setup
Last updated: 2 years ago • 1 versions | Visibility: Public
Prerequisites
- Unity 2020.3.x (with Android Build support)
- OpenXR (1.5+)
- TextMeshPro
- (Optional) XR Interaction Toolkit
Setup
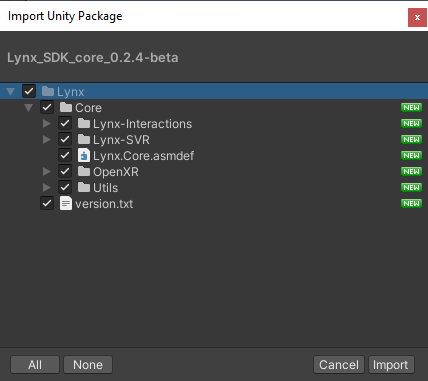
1. Import Lynx Core unity package
First, you need to import the Lynx SDK Core in your project.

2. Configure project automatically
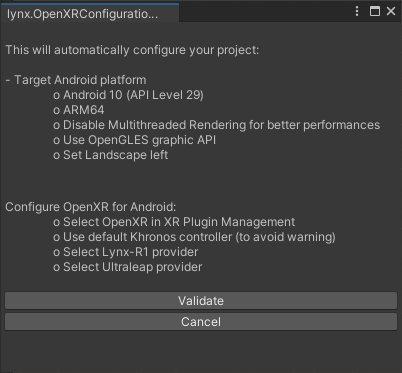
To build an application for the Lynx Headset, use the "Lynx" menu to automatically configure the project for you.

A popup indicating the changes done on your project should appear. You can "Validate" the changes.

Once validated, you should have the following changes:
- Switch to Android platform
- Target ARM64 architecture (headset is based on XR2 chipset)
- Disable multithreading rendering (to optimize other threads for sensors)
- Set Landscape left presentation
- Target OpenGLES Graphics API
- Set target Android API 10
- Select OpenXR in XR Plugin Management (currently unstable)
- Select Khronos controller
- Enable Lynx-R1 service
- Enable Ultraleap service
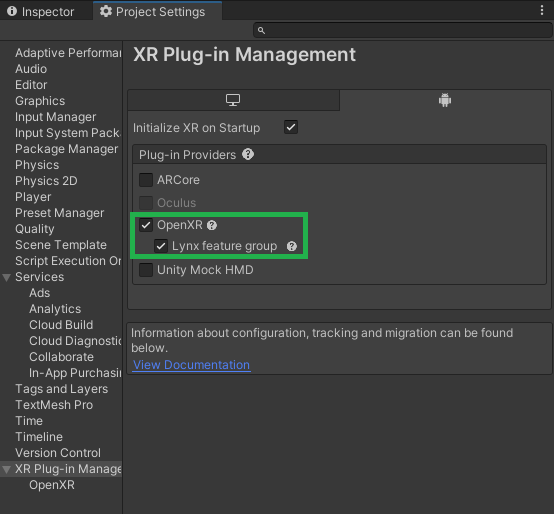
Warning: enabling OpenXR from code is currently unstable on this version. Please enable it on Project Settings > XR Plugin Management > enable OpenXR (Android tab).

3. Scene setup
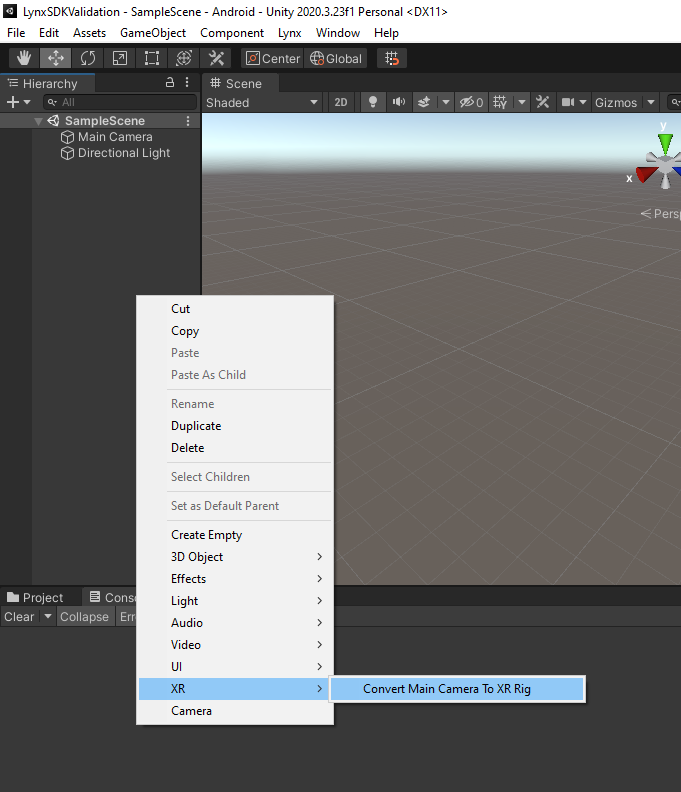
As Lynx is based on OpenXR, please make sure that the camera is compatible.

4. Test it
You can now build and run the application on your headset.
The Lynx Core is focused on AR/VR and lets you move inside the scene you made with 6DoF tracking.
Warning: without any controllers (ex: handtracking), your only way to go back to the home application is to use "back" button on the headset.
More information for handtracking and modules for interaction in the next sections.