Updating your device
Last updated: 7 months ago • 15 versions | Visibility: Public
UPDATING OR RESTORING YOUR LYNX-R1
We are dedicated to updating the software on Lynx-R1, and on this page you will learn how to update your headset to the latest firmware available or restore it to a specific version.
UPDATING TO THE LATEST FIRMWARE
It is best to plug your headset to charge it while this process occurs.
- Turn on your headset and put it on
- The launcher app has a Settings tab, click on it with your finger
- Connect your headset to a Wifi network through the Wifi menu
- Click the button "Update" on the main Settings panel if an update is available for your device
- Let the process download the latest firmware and apply it, this could take several minutes, and will also depend on your internet connection speed.
If this process does not work, see the rest of this document.
UPDATING TO A SPECIFIC VERSION
If for some reason you want to reverse an update or update to a specific firmware version, it is possible with your Lynx-R1.
You will need a computer for the following steps.
In your headset:
- Turn it on, the launcher should start
- Go to Settings, and turn on the toggles "Turn on File transfer" and "Turn on debug"
- Keep your headset on, but you can turn the displays off.
On your computer:
- Install "adb" on your computer. This utility will create a bridge between your headset and your computer. You can follow this guide.
- Go to the Lynx-R1 firmware download page, choose your version and download it on your computer.
- Once download, open a prompt/terminal window, and type:
adb reboot sideload-auto-reboot
adb wait-for-sideload
adb sideload YourVersion.zip
with YourVersion.zip replaced with the downloaded file.
None of this works! What do I do?
Sometimes you can't access the launcher, or the update process might not work (if you have a rooted device), or you just see a black screen. For this reason, there is a last resort.
RESTORE YOUR LYNX-R1 WITH QFIL
Lynx-R1 is using the XR2 chipset from Qualcomm. There is a protocol we can use to restore the firmware chipset (and the full OS) with it, as long as you can turn the headset on.
QFIL, also known as the Qualcomm Flash Image Loader, is a Windows-based software tool designed to flash or install firmware images onto devices powered by Qualcomm.
Requirements
QFIL only runs on Windows. We recommend Windows 10 or 11.
If you are using another platform (Mac, Linux), please see the very end of this document.
Step 0
Install QFIL and QUD (the Qualcomm USB Driver) on your computer.
Download and unzip the latest Lynx firmware containing files that are needed by QFIL.
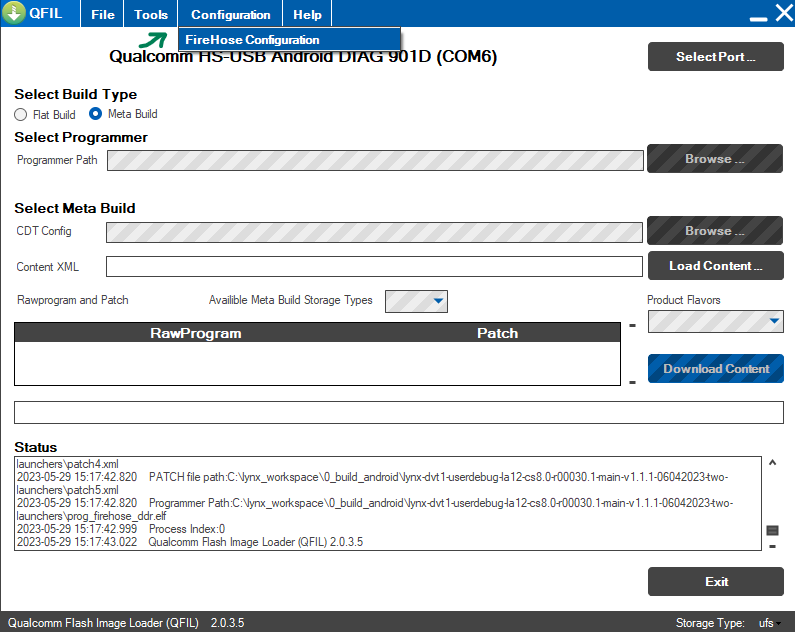
Step 1
Open QFIL and select "Configuration"
Step 2
Have the matching configuration (WARNING: do not enable "Erase All Before Download" to avoid loss of distorsion and calibration files)
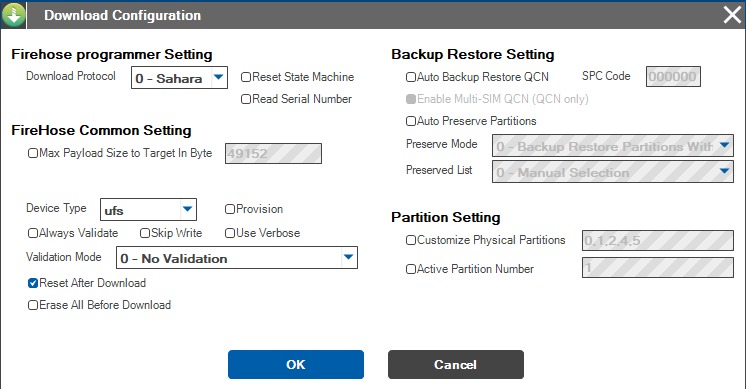
Step 4
Validate by clicking "OK"
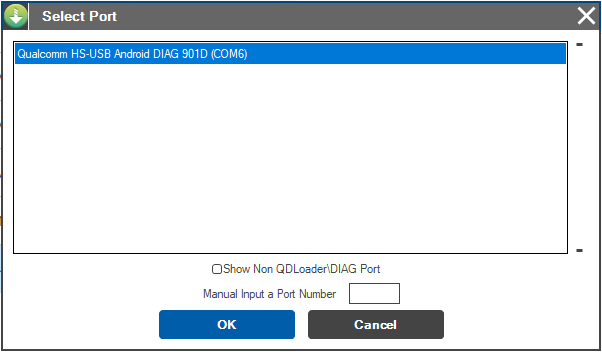
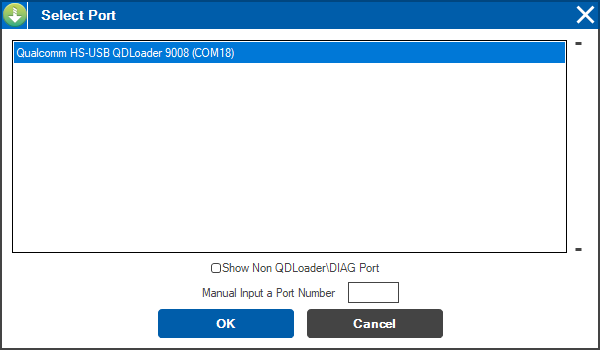
Step 5
With the headset plugged , click on "Select Port...", select the only available line, then "OK"

Step 6
Select "Flat Build"
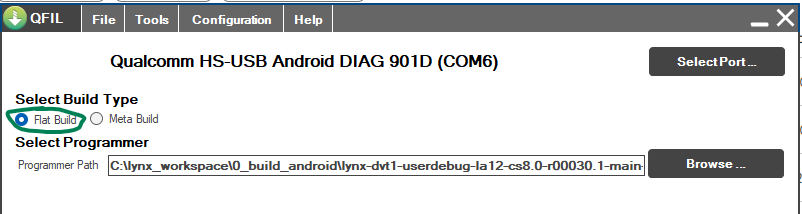
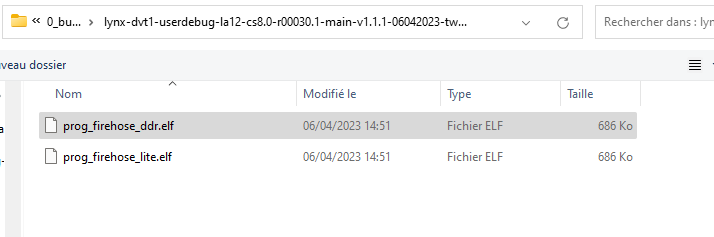
Step 7
In "Select Programmer", "Programmer Path", click on "Browse..." and look into the firmware folder for files with the .ddr extension.
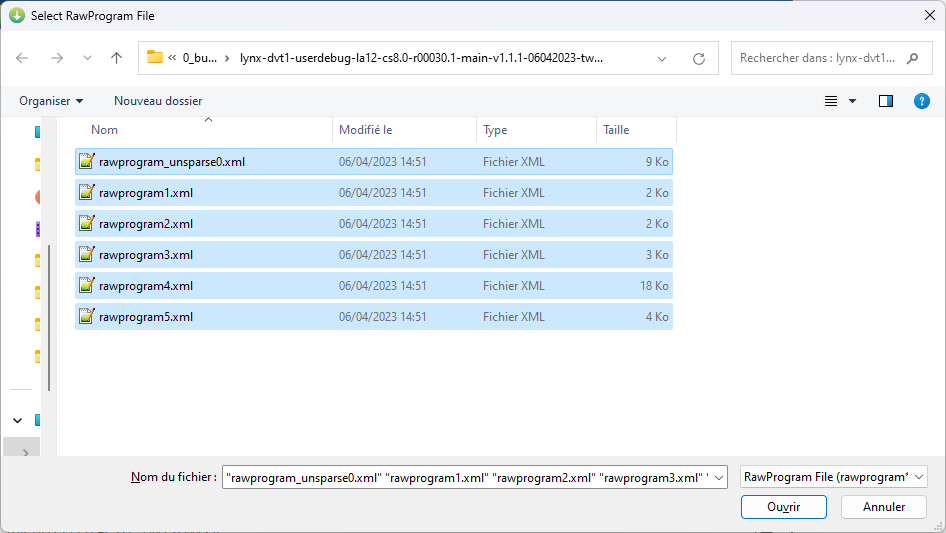
Step 8
Then, click on "Load XML" and select all the suggested files
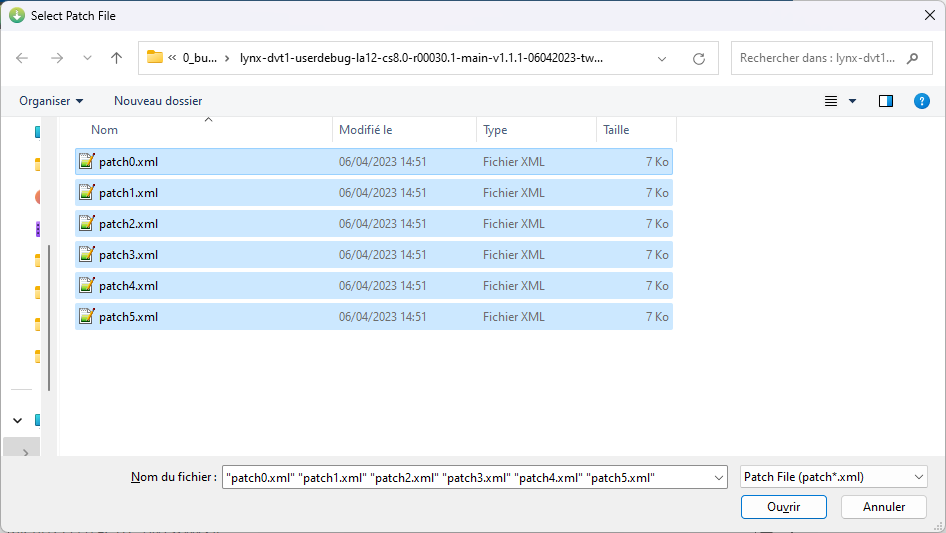
Step 9
A popup should appear, select all patch files
Step 10
Click on Download. You shoul have a "Success" log once finished.
The headset should reboot automatically once done.
If you have an error, Open the "Select Port", then click on three buttons : Power + Vol Up + Vol Down, until you see QDLoader 9008 image appeared (could take ~10-20 seconds)
Then click OK and "Download" again.
Do you still need help?
Please address your case to the support section of our Portal. There is a help section where you can chat directly with our engineers.
Note for Mac and Linux users who want to restore with QFIL: You can use the CLI tool known as QDL. The command to type should look like this (with the firmware unzipped in a folder named "la12" in this example):
For Linux specifically,
- temporarily disable ModemManager
- run qdl command
- in another terminal tab, run adb reboot edl
adb reboot edl
./qdl --debug --storage ufs --include la12 la12/prog_firehose_ddr.elf la12/rawprogram_unsparse0.xml la12/rawprogram1.xml la12/rawprogram2.xml la12/rawprogram3.xml la12/rawprogram4.xml  la12/rawprogram5.xml la12/patch0.xml la12/patch1.xml la12/patch2.xml la12/patch3.xml la12/patch4.xml la12/patch5.xml