Getting Started
Last updated: 1 month ago • 30 versions | Visibility: Public
What's in the box?
The Lynx-R1 packaging
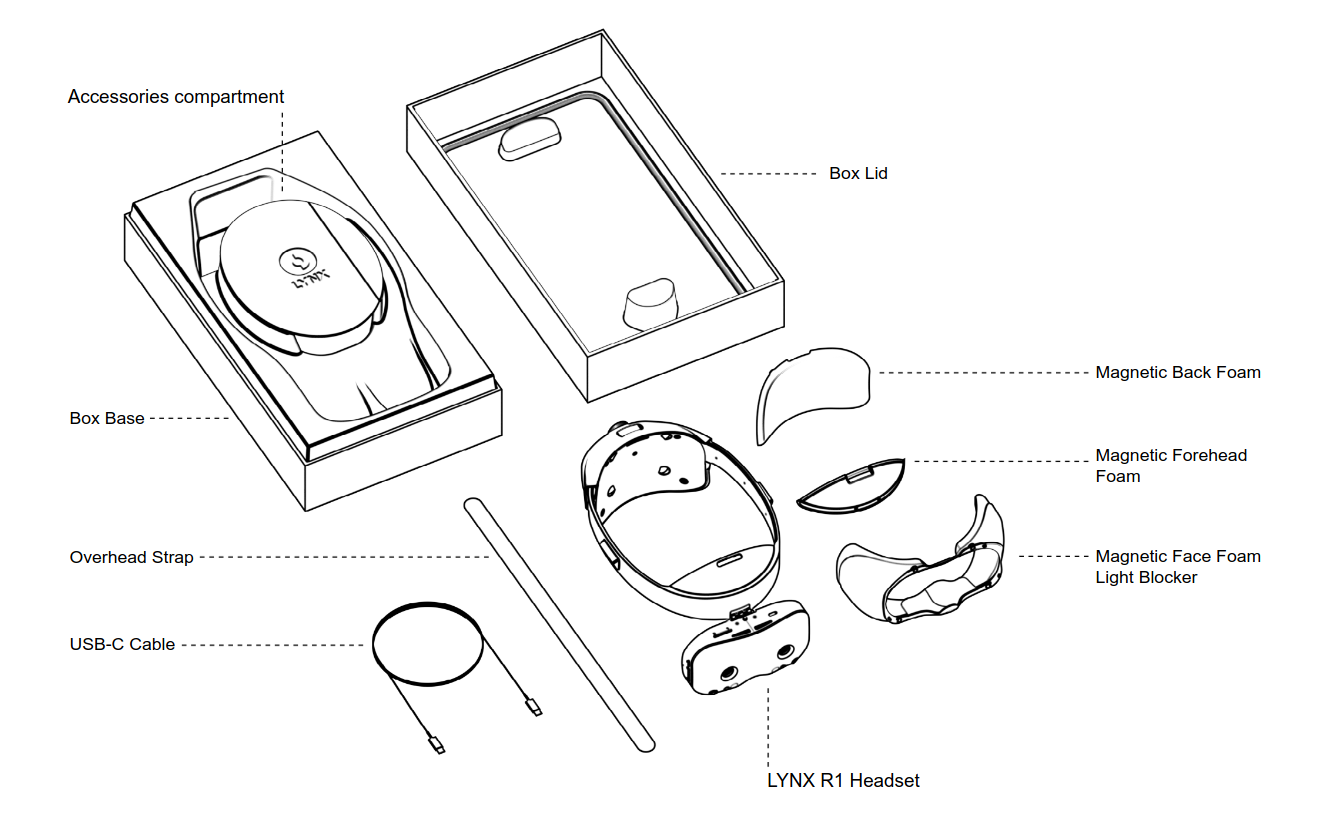
The Lynx-R1 packaging contains the headset as well as a set of accessories listed below:
- Magnetic Back and Forehead foams (already mounted)
- Magnetic Light Blocker face foam
- Overhead strap
- USB-C cable
- Lynx microfiber front pouch
The magnetic Light Blocker face foam has been designed to provide full immersion when using VR apps. It is compatible with most pairs of glasses.
Note : we recommend removing the Light Blocker foam to users prone to cybersickness as the peripheral vision will alleviate most of the effect
The overhead strap is optional, it provides additional comfort when wearing the Lynx for extended periods of time.
The USB-C cable is angled 90° in order to use the flip-up functionnality even when plugged in.
Lynx-R1 buttons, sensors and connectors
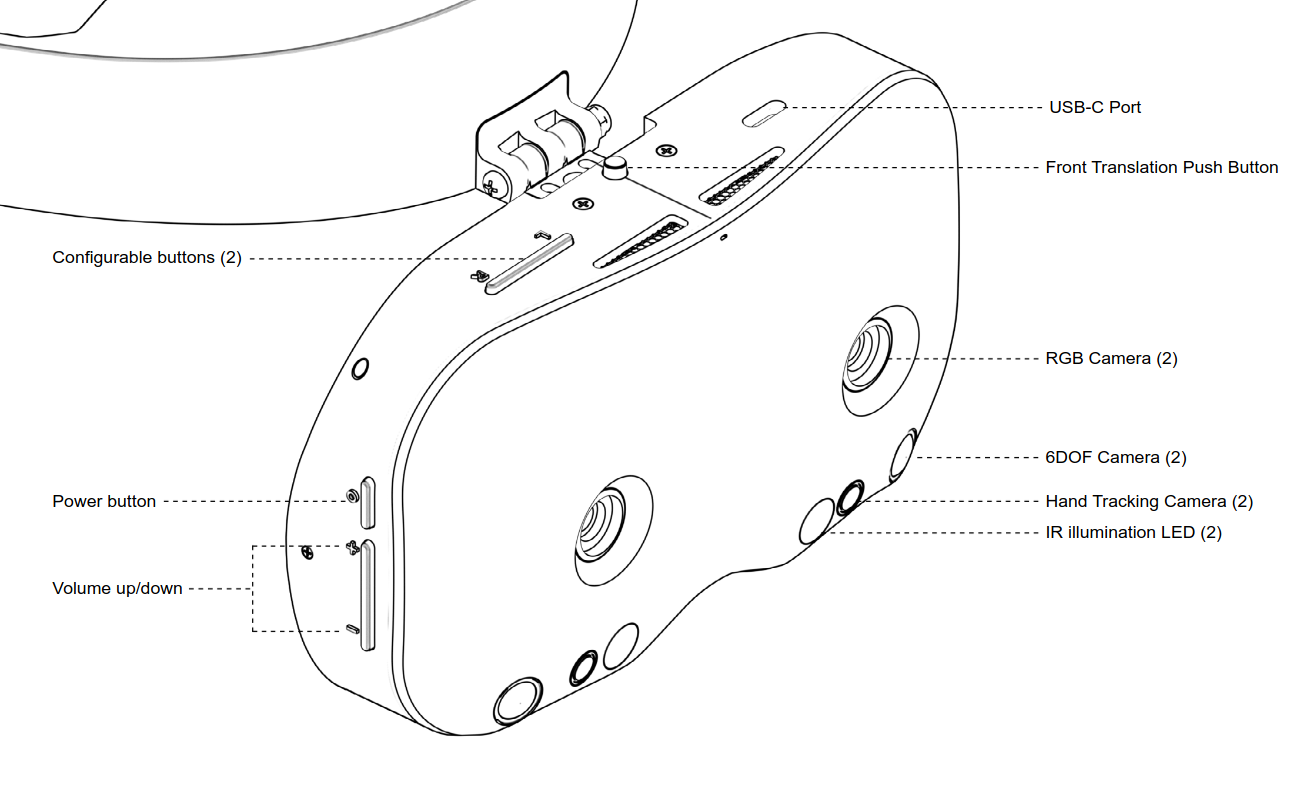
Front view of the Lynx-R1

Internal view of the Lynx-R1
Functionalities
Power Cycle:
- Pressing the Power button for 2 seconds will turn the device on and off
- Pressing the Power button and the Volume + button for ~30 seconds enables device recovery if the battery is completely depleted
- Pressing the Power button shortly puts the device in Standby mode. The Standby mode will turn off the displays and pause some high-compute services. This mode is also triggered when the proximity sensor detects that the headset is not worn
IPD Adjustment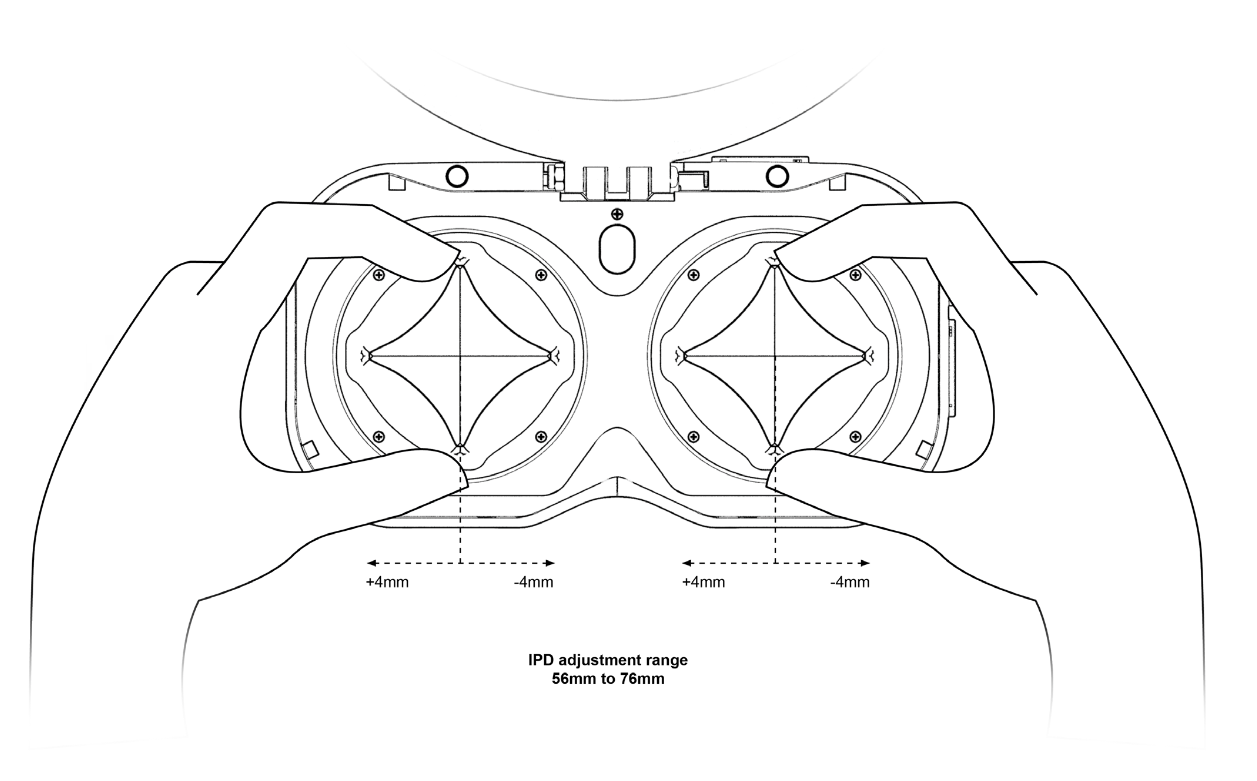
Each of the two lenses of the headset can be moved independently to adjust the IPD, the range is 56 to 76mm.
The Lynx-R1 lens is a unique prism that will require an IPD adjustment in order to find the sweet spot. In case of misalignment (when the user's eyes do not match the lenses positions), please follow these recommendation:
- In case of a vertical misalignment, adjust the IPD setting of the lens(es)
- In case of a horizontal misalignment, adjust the tilt of the front module by slightly moving it up or down
Eye Relief adjustment
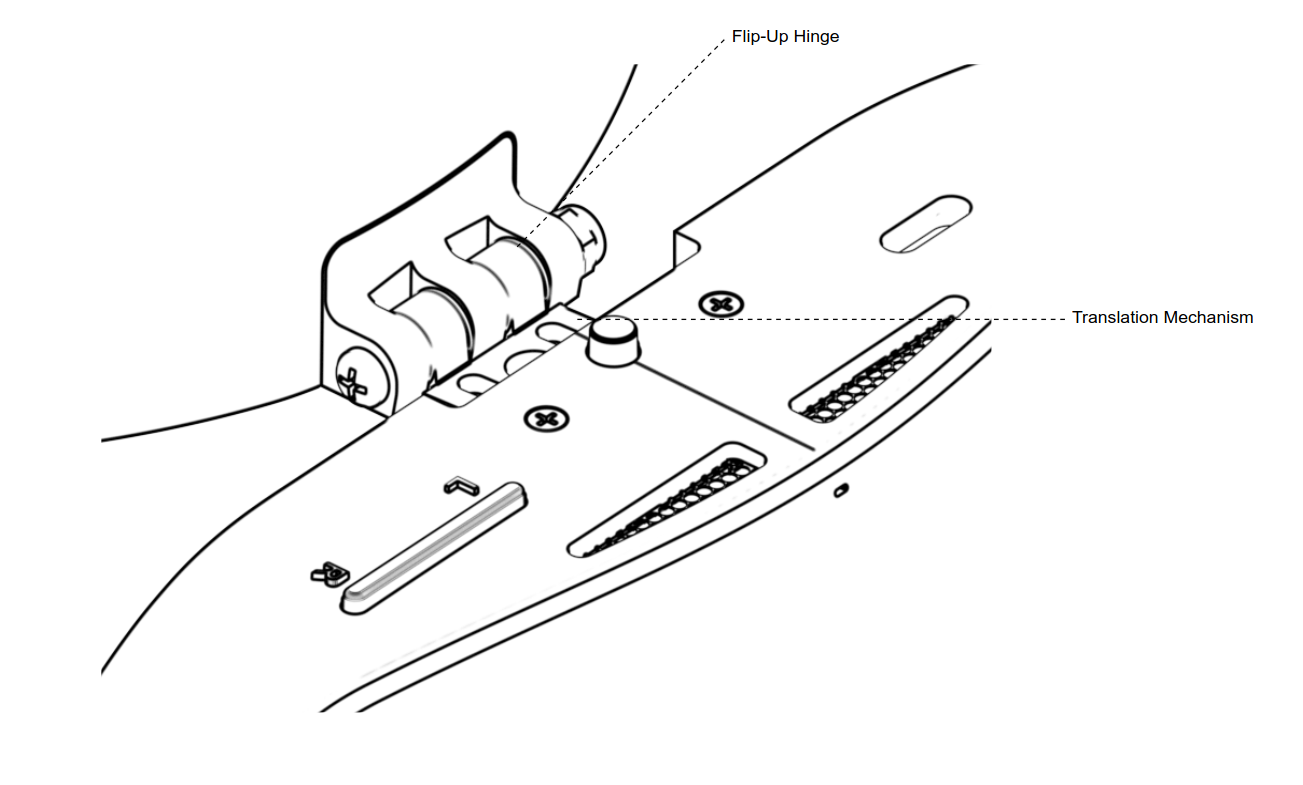
The flip-up and translation mechanism
The front module of the Lynx-R1 can be flipped-up completely to get back to the real world without having to take off the headset.
It is also possible to adjust the distance between the front module and the face, this can be particularly useful to adjust when wearing glasses.
To adjust the distance, press the central button on the top of the headset to unlock the mechanism and pull the front module away or closer to the head strap.
VR mode
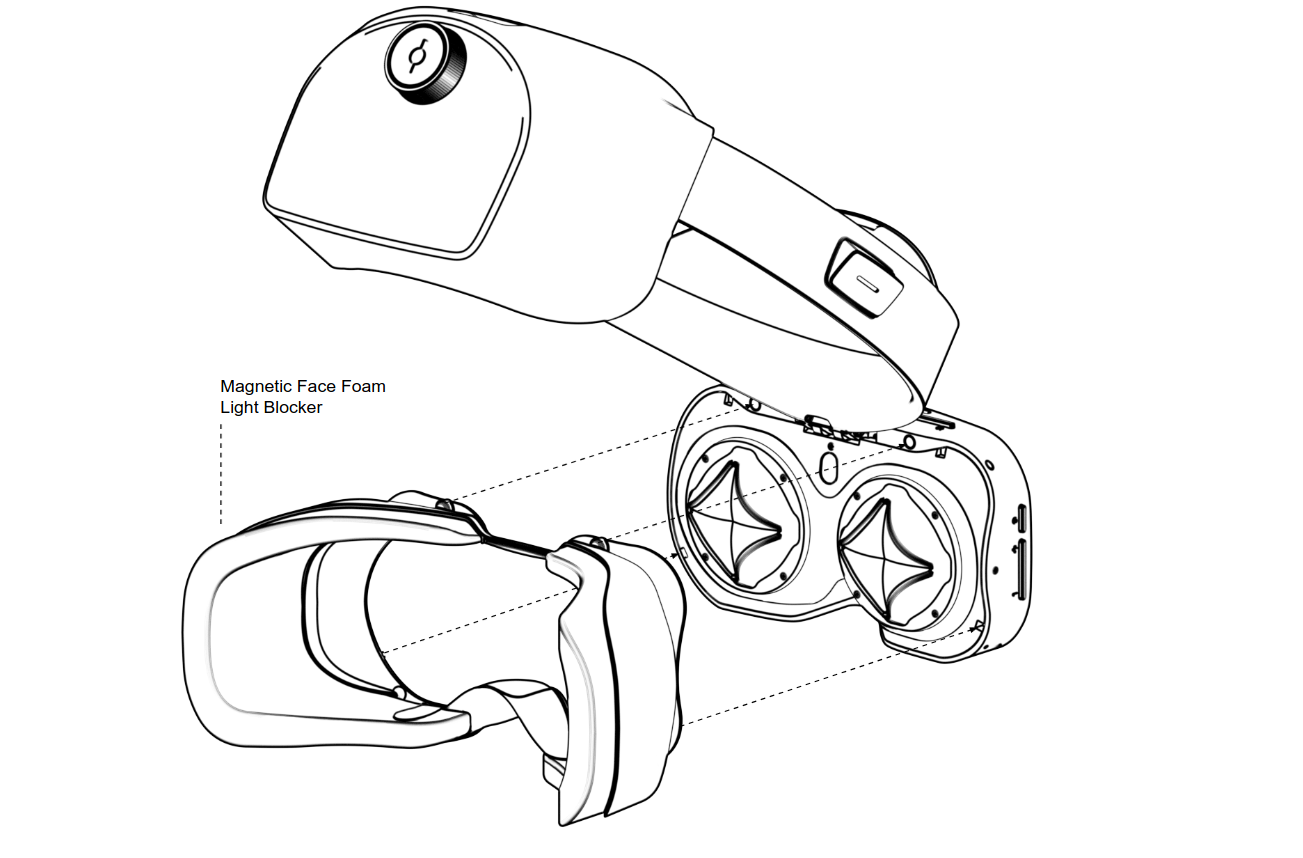
We recommend using the Light Blocker foam when in a VR-only app to increase immersion. Simply clip on the Light Blocker foam to the front module with its magnets.
We advise removing the face foam when using Mixed Reality apps as the real world in the peripheral vision aligns with the field of view of the headset almost perfectly. This helps proprioception and enhance the Mixed Reality experience.
Troubleshooting
When encountering an issue with the device, please follow the recommendations below:
In any case, do not try to open the device, especially the front module. Each headset goes through a complete calibration process for its cameras, IMU and gyroscope after manufacturing. If these components move slightly, the calibration may become invalid which will likely result in poor 6DoF tracking (hand-tracking may also stop working).
For any issue with the device, please refer to the Support section. The Help! forum is a space where the topics are only visible by the user and our team.
As the bootloader is open, it is possible to flash a different system image to the device. However, if an unsupported system image has been flashed or if system data have been tampered with, it is possible to restore the device and the calibration files by downloading the system and calibration profiles from this website.
