Getting Started
Last updated: 6 months ago • 30 versions | Visibility: Public
What's in the box?
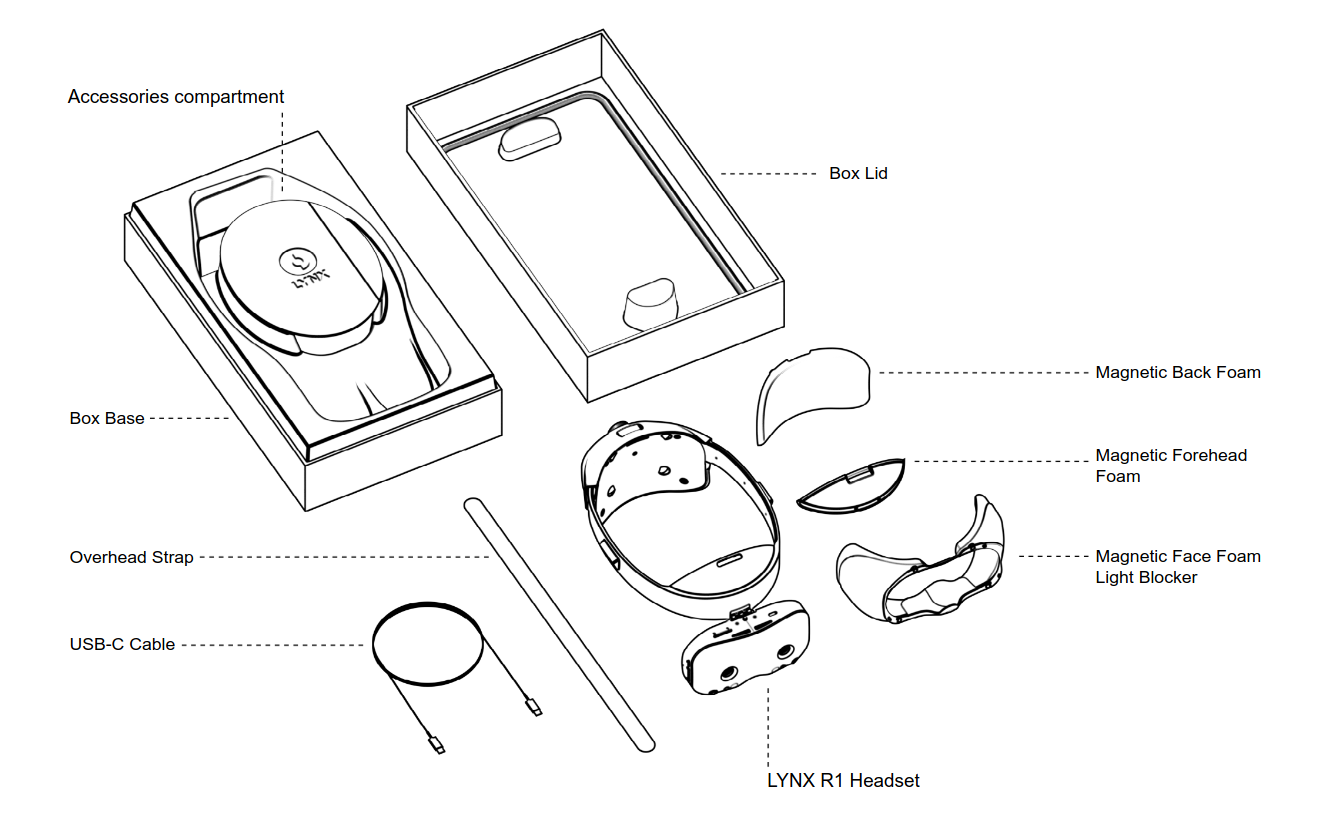
Inside the Lynx R-1 packaging
When you open the package, you should find your headset with some accesories.
The overhead strap is optional, but it's nice to have it on if you plan to use your Lynx over long periods of time.
The USB-C cable is 90° titled so you can still use the flip-up function even when it is plugged in.
The magnetic foam is great to clip on the Lynx if you only use VR apps. It greatly improves immersion in VR, and is compatible with most pairs of glasses.
The Lynx R-1
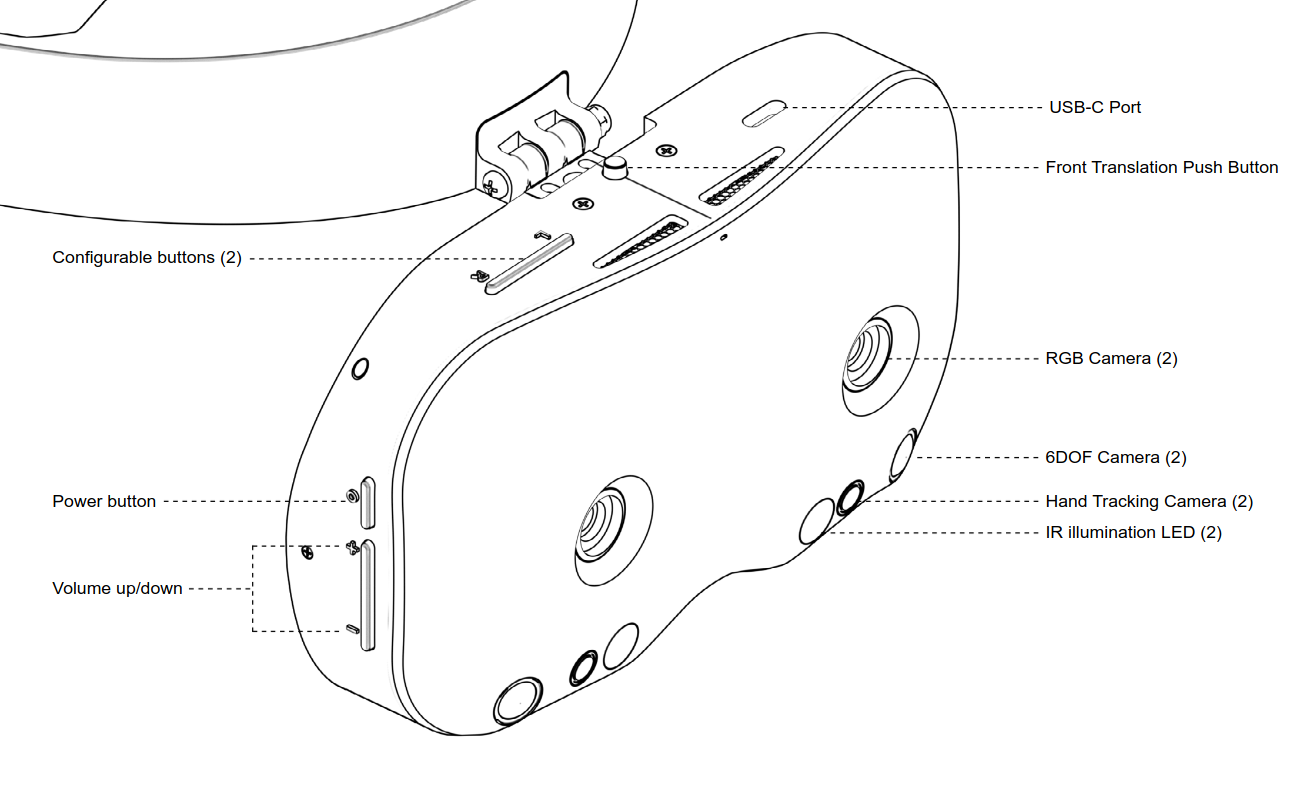
The front part of Lynx R-1

Internal face of Lynx R-1
Power Cycle:
- Press the Power button for 2 seconds to turn it on and to turn it off.
- Press the Power button and the Volume + button for ~30 seconds if your device battery was depleted and has a hard time coming back
- Press the Power button shortly to put it in Standby mode. The Standby mode will turn off the displays and pause some high-compute services. This mode is also triggered when the proximity sensor detects that you're not wearing the headset anymore.
IPD Adjustment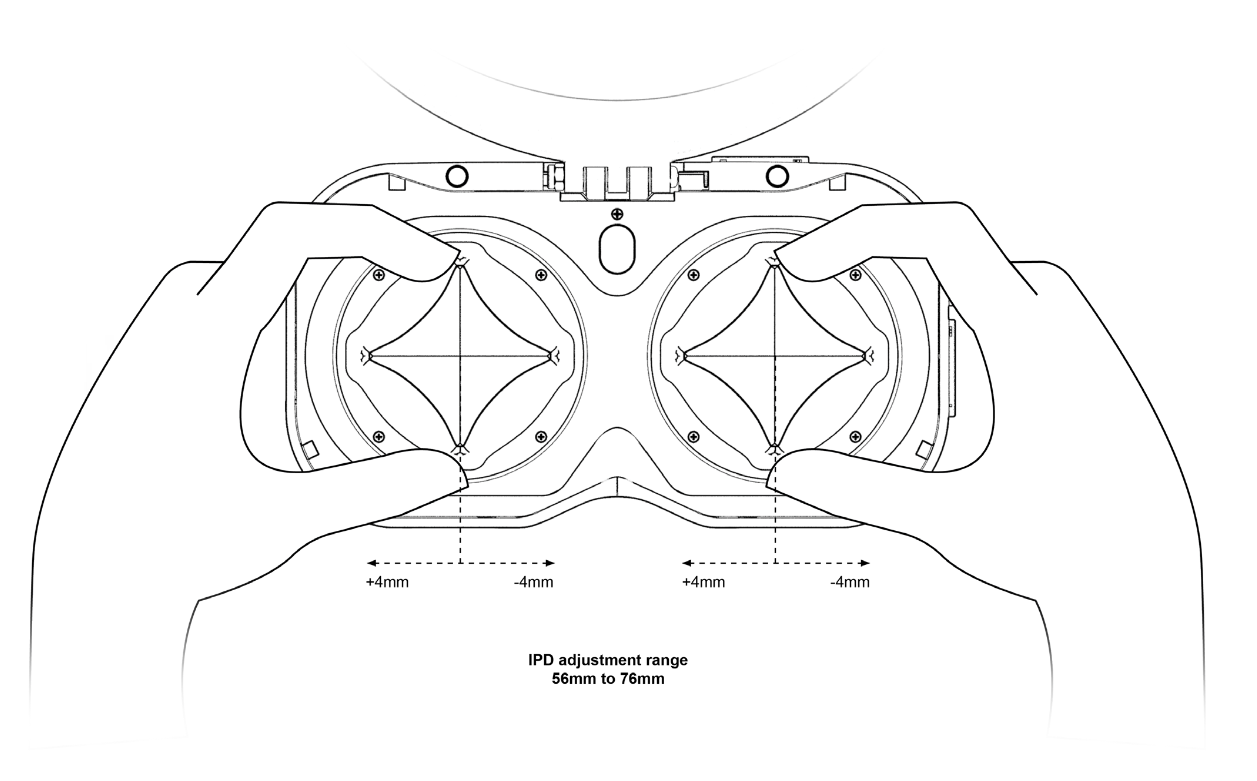
You can manually translate each lens of the headset to adjust it to your IPD.
The lens used in the headset is a very perticular prism, and you will notice quite well if you are not in the sweet spot of the lens.
The rule of thumb:
- If you are seeing a vertical line of aberration, you probably need to adjust the IPD setting of the lens
- If you are seeing an horizontal line of aberration, you probably need to adjust the tilt of the headset on your face
Eye Relief adjustment
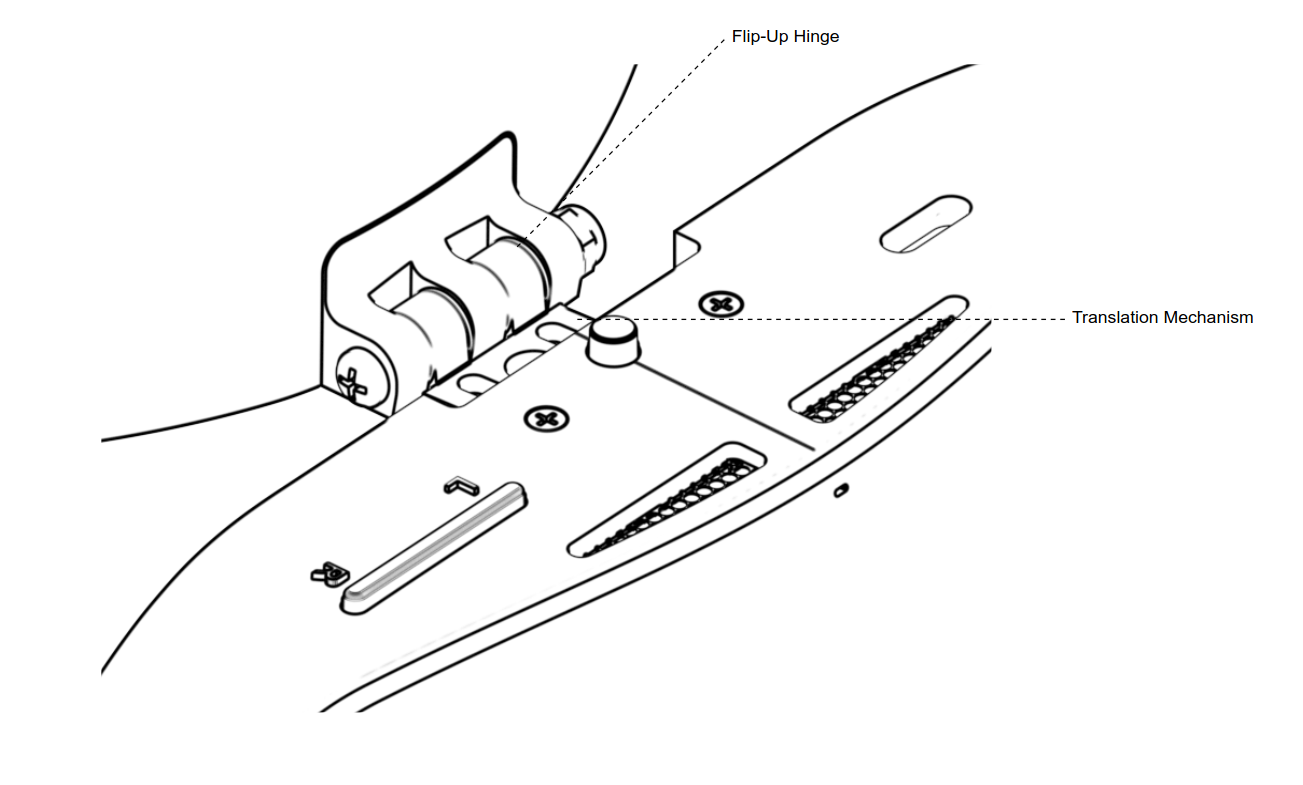
The flip-up and translation mechanism
You can flip-up your headset, but you can also adjust the distance between your face and the headset. It can be convenient to augment this distance if you want to keep your glasses on.
To adjust this setting, press the central button at the top of the headset to unlock the mechanism, and pull the front part of the headset out from the strap, following the axis of the mechanism.
VR-only mode
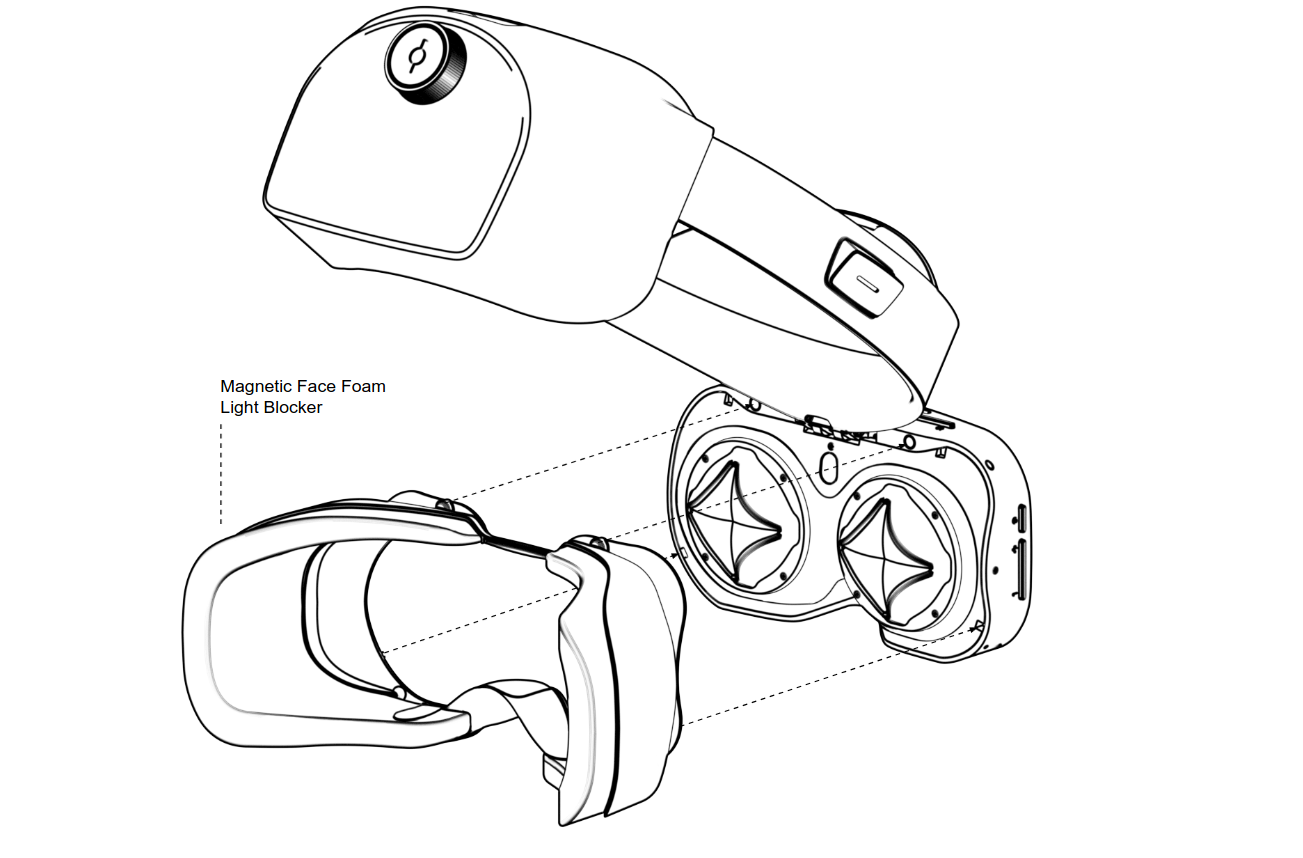
If you are using a VR-only app, it can be better to strap on the face foam. It is easy to set up as it should clip on the front part of the headset with magnets. Make sure it clips well and you should then have a more immersive experience for VR.
We advize to remove the face foam when you use Mixed Reality apps, as the real world in your peripheral vision will align with the field of view of the headset almost perfectly. This helps your proprioception and enhance the Mixed Reality experience.